


Results for "cooking"
#COOKING: MR. WILL X HUBIE HALLOWEEN
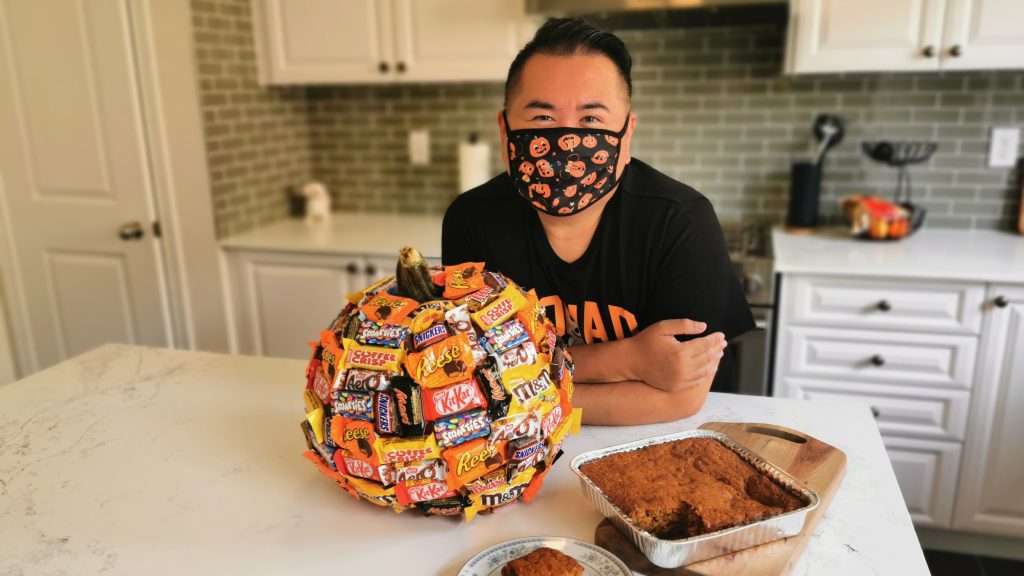
We are thrilled to collaborate with our friends at Netflix to bring you some super fun activities to help put you in that Halloween spirit. If there’s anything we need right now, it’s a lift! Netflix releases #HUBIEHALLOWEEN, starring Adam Sandler, on Wednesday October 7th. You can check out the trailer below. 🎃
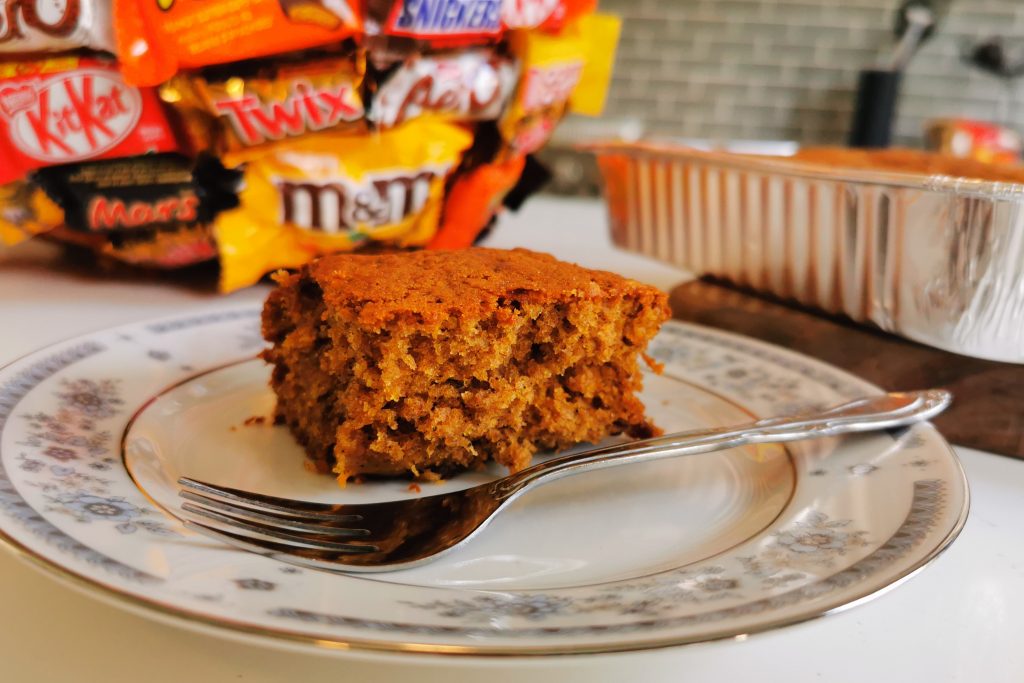
We crafted a FUN SIZE SNACK PUMPKIN which will make a gorgeous, edible Halloween centerpiece and also a PUMPKIN FUN SIZE CHOCOLATE LOAF which tastes exactly like Fall should! You can add a bit of your personality to these and make these YOU with your favourites! We had so much fun putting this together with our friend Angela who generously leant us her gorgeous kitchen for this!

Fall is definitely our favourite season. We love Pumpkin and we whipped-up a PUMPKIN FUN SIZE CHOCOLATE LOAF which you can customize with your own favourite chocolates. Halloween Candy and Pumpkin Spice, together at last! Just remember to be super-careful when carving the bottom of the Pumpkin!
Ingredients:
3 1/2 cups flour
3/4 cup brown sugar
1/4 cup organic raw sugar
2 tsps cinnamon
2 tsps nutmeg
1 tsps ginger
2 tsps baking powder
2 tsps baking soda
1 1/2 tsps sea salt
4 eggs, room temperature
1 cup unsalted butter, room temperature
1/2 cup whole milk
2 cups of pumpkin pulp (seeds removed)
1 cup chopped, assorted Halloween chocolates
Instructions:
1. Preheat oven at 350°F.
2. Grease baking pans (2-3 depending how large they are) lightly and dust with flour.
3. In mixing bowl, cream butter and sugars till creamy with handmixer.
4. Add eggs and beat till smooth.
5. In separate mixing bowl, combine spices, flour, baking powder and soda, plus salt.
6. Add dry ingredients to wet ingredients in large mixing bowl, mixing sparingly.
7. Using spatula, gently fold-in pumpkin pulp.
8. Using spatula, gently fold-in chopped chocolates.
9. Pour batter into baking pans and smoothen with spatula.
10. Bake 45-60 minutes, checking after 45 minutes with fork/toothpick for doneness. Once done, remove from oven and allow to cool for about 40 minutes before serving.
See our How-To Video:
A Carousel of fun:
Have fun and let us know what you think! Don’t forget, #HUBIEHALLOWEEN arrives on Netflix Wednesday, October 7, 2020!
More on HUBIE HALLOWEEN here.
(Photo/video credit: Mr. Will Wong/Netflix)
#COOKING: CLASSIC APPLE PIE RECIPE
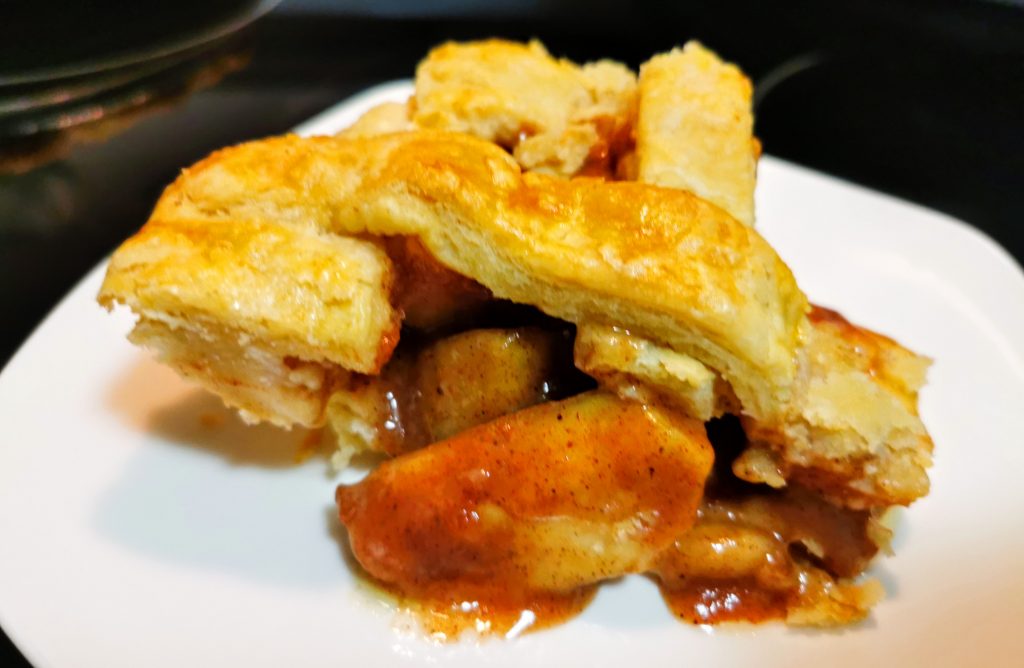
Classic Apple Pie. As you might recall we went Apple Picking last week. What better way to celebrate the fruits (pardon the pun) of our labour than our Classic Apple Pie recipe? A flaky, buttery crust with chunky, tart and sweet Ontario apples in a goopy caramel-like filling. Autumn’s arrived. 🍎
Pie Pastry:
2 1/2 cups flour
1 1/2 tsps sea salt
1/2 cup butter, chilled
3/4 cup Crisco Golden All-Vegetable Shortening, room temperature
1/2 cup cold water
1 egg beaten, used as egg wash
Filling:
8 apples (we mixed McIntosh, Sweet 16 and Royal Gala), cored, peeled and cut into chunks and sprinkled with 1 tbsp lemon juice
1/2 cup water
3 tbsps flour
1/4 cup organic raw sugar
1/2 cup brown sugar
2 tsps cinnamon
3/4 tsp nutmeg
1 tbsp unsalted butter
Instructions:
1. Prepare pastry, combining ingredients, adding water 1 tbsp at a time, handling minimally. Knead dough gently on floured surface. Roll into ball. Chill minimum 2 hours, no more than 5 days.
2. Prep filling. In saucepan, bring butter, 1/2 cup water and sugars to boil. In separate bowl, beat flour with 3 tbsps water to form a slurry. Whisk this quickly into the water/sugar mixture till thick. Remove from heat. Run through sieve if lumpy. Transfer to a bowl and mix-in cinnamon and nutmeg. Set aside.
3. Preheat oven to 425°F.
4. Cut dough into halves. Shape into discs. Roll first half starting from center-outwards onto floured surface.
5. Fit dough into pie dish, covering edges. Fill shell with apple chunks and then pour sauce over top, covering evenly.
6. Take other half of dough and form circle large enough to cover top of pie dish, rolling center-outwards on floured surface. Use ruler and cut 10-12 equal size strips.
7. Layer strips, forming lattice over top of pie, sealing edges tight, pressing down with a fork.
8. Brush top of lattice using egg wash using brush or finger.
9. Place pie dish on baking sheet. Use foil and form a ring around edge of crust.
10. Bake for 15 minutes. Reduce heat to 350°F with pie in oven and bake another 35-40 minutes till golden. 10 minutes before finished, carefully remove foil ring.
11. Cool minimum 3 hours. Serve with ice cream.
Gallery:
(Photo/video credit: Mr. Will Wong)
#COOKING: MEATBALLS x PASTA RECIPE

Meatballs x Pasta. Fall means comfort foods and our favourite always has been Spaghetti & Meatballs. Of course now that we’ve grown-up we’ve found little ways to elevate and make it a bit more sophisticated. We hope you like our take!
Ingredients:
17.6 oz Alfetra Pasta (i.e. Vesuvio)
1/2 lb medium ground beef (or lean if you prefer, medium makes for more tender results)
1/2 lb ground pork
1 cup Panko Breadcrumbs
1 can crushed tomatoes
1 can tomato paste
1/2 cup whole milk
1/4 cup grated Parmesan Cheese
3 tbsps unsalted butter
4 slices of Mozzarella/Havarti Cheese, sliced into small squares
1 egg
1 red pepper, seeded and diced
1 white onion, minced
8 cloves garlic, minced
1/4 cup chopped Parsley
1/4 cup chopped Basil
4 Bay Leaves
4-5 Anchovies in oil
2 tbsps organic raw sugar
2 tbsps Truffle Oil
Sea salt and Pepper, to taste
Instructions:
1. In large bowl, use hands to mix ground beef and pork, egg, half of onion, parsley, basil and garlic, Panko, milk, Parmesan, 1 tbs of truffle oil, salt and pepper. Roll into about 20 meatballs, stuffing each with a bit of cheese slices.2. Cook in Air Fryer at 400F for about 9 minutes, dividing meatballs in two batches. Transfer to platter.
3. Cook pasta in salted water until al dente. Reserve a few ladles of the water for later. Strain pasta.
4. In large sauce pan, sautee on medium-high heat the remaining garlic, onions and red pepper, in 1 tbsp truffle oil.
5. Add tomatoes and paste and about 1/3 cup of water. Bring to boil.
6. Add bay leaves, anchovies, sugar and remainder of parsley and basil.
7. Add in meatballs, season sauce with salt and pepper and reduce to simmer. Cook for minimum two hours on low heat, stirring occasionally.
8. When ready to plate, take a large skillet and on medium heat, melt butter. Toss-in pasta and season with a bit more salt. Pour-in a couple ladles of reserved pasta water and add a bit of chopped basil, stirring gently.
9. Pour a couple ladles of sauce from the meatball mixture into the pasta, again stirring gently. Remove from heat.
10. Plate pasta. Spoon meatballs and sauce on-top of pasta. Garnish with Parmesan and basil.

(Photo credit: Mr. Will Wong)
#COOKING: SPICY PEACH CALIFORNIA ROLL RECIPE
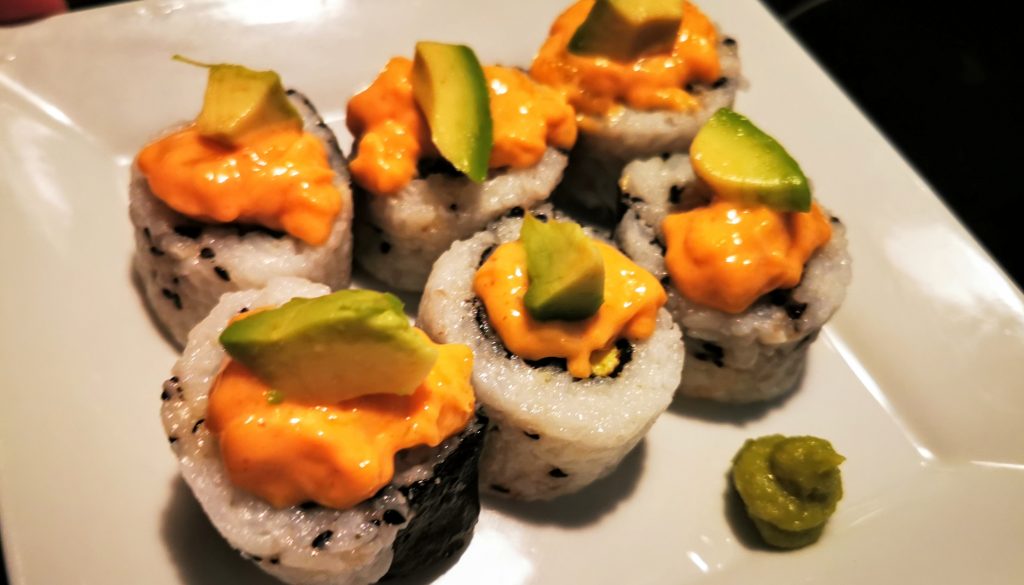
Spicy Peach California Rolls. We had forgotten how fun it is to make Sushi at home! These are simple and while it might take a couple tries to perfect a nice tight roll, this is totally worth it and fun to do with others.
Maki:
1 1/2 cups Botan Calrose Rice
4 sheets Nori
2 eggs, beaten
4 strips of Surimi (artificial crab), halved length-wise
1/4 cucumber, sliced into thin strips
1/2 avocado, sliced into thin strips
4 tbsps seasoned rice vinegar
2 tbsps organic raw sugar
3 tbsps black sesame, toasted
Sea salt
Sriracha-Peach Mayo:
1 peach, skinned and sliced thin
1 tbsp organic raw sugar
3 tbsps Mayonnaise
1 tsp Sriracha
Instructions:
1. Cook rice in rice cooker with 2 1/4 cups of water. Unplug once cooked and cool for 10 minutes. Stir-in vinegar, sugar and salt to taste and set aside. Sprinkle sesame seeds and mix gently into rice.2. In sauce pan, cook peach slices with 1 tbsp sugar and 1 tbsp water on medium heat till softened (about 5 minutes), stirring often. Once cooked, transfer to a bowl and mix-in Mayo and Sriracha and whisk with fork till smooth.
3. Set toaster oven to 200°F. Toast Nori for about 1 minute, careful not to toast too long as these burn quickly. Set aside.
4. Grease skillet and fry beaten egg, folding over with spatula 3-4 times as it cooks till it forms a narrow rectangular bar. Set aside once cooked and slice into thin strips.
5. Line plastic wrap on bamboo sushi mat. Once rice cools down, divide into four equal portions. Use clean hands and pat rice down onto wrap. Flatten rice with hands until you have enough to cover about 3/4 of a Nori sheet. Occasionally rinse hands with water if too sticky. Place Nori sheet on-top of rice, shiny side facing you.
6. Line avocado, cucumber, artificial crab and egg strips length-wise in rows.
7. Carefully lift edge of Nori and roll it over filling. Continue to roll over about 2-3 more times over and cover it with plastic wrap. Take bamboo mat and wrap it over the sushi roll. Roll 2-3 times tightly, careful not to press too hard.
8. Using a sharp knife, cut each roll in half. Then take each half and cut three pieces. Rinse knife with water if it gets too sticky.
9. Arrange pieces on plate. Top with small dollop of Sriracha-Peach Mayo and a small bit of avocado. Serve with wasabi and soy sauce if you like. Yields about 24 maki.
Gallery:
(Photo credit: Mr. Will Wong)
#COOKING: PAD THAI RECIPE
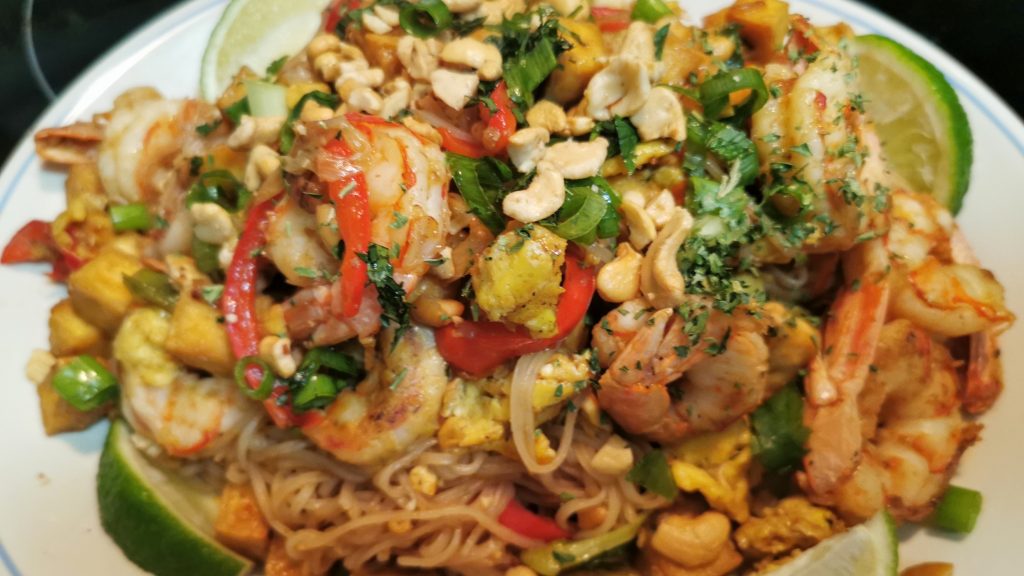
Pad Thai. Who doesn’t love Pad Thai? You can actually make this at home rather easily. I don’t love Bean Sprouts, hence I didn’t include them in my version, but if you do like them, you can add in 1-2 cups. You can substitute shrimp for chicken breast or thigh pieces. And I get some people just don’t do Shrimp Paste and Fish Sauce as they are pungent, but truly you’re not a fan of Pad Thai if you don’t enjoy those essential notes which make it authentic.
Ingredients:
1/2 package of Rice Noodles
12 Jumbo Argentinian Shrimp, shells removed and deveined
1 block of firm Tofu pat-dry and cut into small cubes
1/2 cup cashews, crushed
1/2 sweet red pepper, sliced thin
3 tbsps Tamarind Paste (if you absolutely can’t find, then ketchup it is)
3 tbsps Brown Sugar
2 tbsps Oyster Sauce
2 tbsps Fish Sauce
2 tbsps Rice Vinegar
1/2 tsp Sambal Sauce
1/4 tsp Shrimp Paste
2 eggs, beaten
1/2 white onion, minced
4 garlic cloves, minced
2 stalks green onion, chopped
1 lime, sliced in wedges
Cilantro, minced
Olive oil
Sea salt and pepper
Instructions:
1. In bowl, coat tofu cubes in a drizzle of olive oil. Air-fry at 380°F for about 12 minutes, stirring once. Divide in two batches if too crowded. You also can deep fry in oil till golden for same effect. Set aside.
2. Soak noodles in a large pot of hot water for about 7 minutes till noodles are “cooked”. Drain noodles, but ensure they are not out of water for more than 10 minutes as they will dry and harden.
3. In small bowl, mix fish, tamarind and oyster sauces with sugar, rice vinegar and shrimp paste. Set aside.
4. In large skillet, heat oil on medium-high heat. Sautée red peppers, green and white onions and garlic (also sprouts if you like) till caramelized.
5. Add shrimp and cook 1-2 minutes till slightly cooked. Shift with spatula to side of skillet.
6. Add whisked eggs and scramble with shrimp, pepper and onion mixture. Once almost cooked, shift to side of skillet again. The trick is not to cook the eggs and shrimp too well just yet.
7. Toss-in tofu, half of cashews and bowl of sauce and cook till you get a bit of bubbling.
8. Toss-in noodles and coat in sauce entirely. Heat for about 2 minutes and remove from skillet.
9. Transfer to plate, layering shrimp and tofu on-top of noodles. Garnish with lime wedges, cilantro, more cashews and some green onion. Serve.
Gallery:
(Photo credit: Mr. Will Wong)
#COOKING: SALTY ‘N’ SWEET RICE KRISPIE TREATS RECIPE
Salty ‘n’ Sweet Rice Krispie Treats. You haven’t had a Rice Krispie Treat till you’ve had it done like this. These are dangerous. What a crunch! Sorry for any addictions that may result.
Ingredients:
5 cups Rice Krispies
3 cups Mini Marshmallows
1/3 cup peanut butter
1/4 cup butter
1/4 cup cashews, broken
1 cup Original Pringles, crushed
1/2 tsp sea salt
Instructions:
1. In large pot, melt butter with salt and 2 1/2 cups mini marshmallows over medium heat, stirring often.
2. Add-in peanut butter and stir till smooth.
3. Turn-off heat and add Rice Krispies, half of the Pringles and cashews. Stir with spatula till evenly combined.
4. Add-in remainder of marshmallows, careful not to stir too much.
5. Transfer mixture with spatula into a pan.
6. Press remainder of Pringles on-top till surface is even.
7. Cool at room temperature for about an hour. Cut into squares and serve. You can wrap each square individually in plastic wrap and store in air-tight container for about two days or you can freeze them.
Gallery:
(Photo credit: Mr. Will Wong)
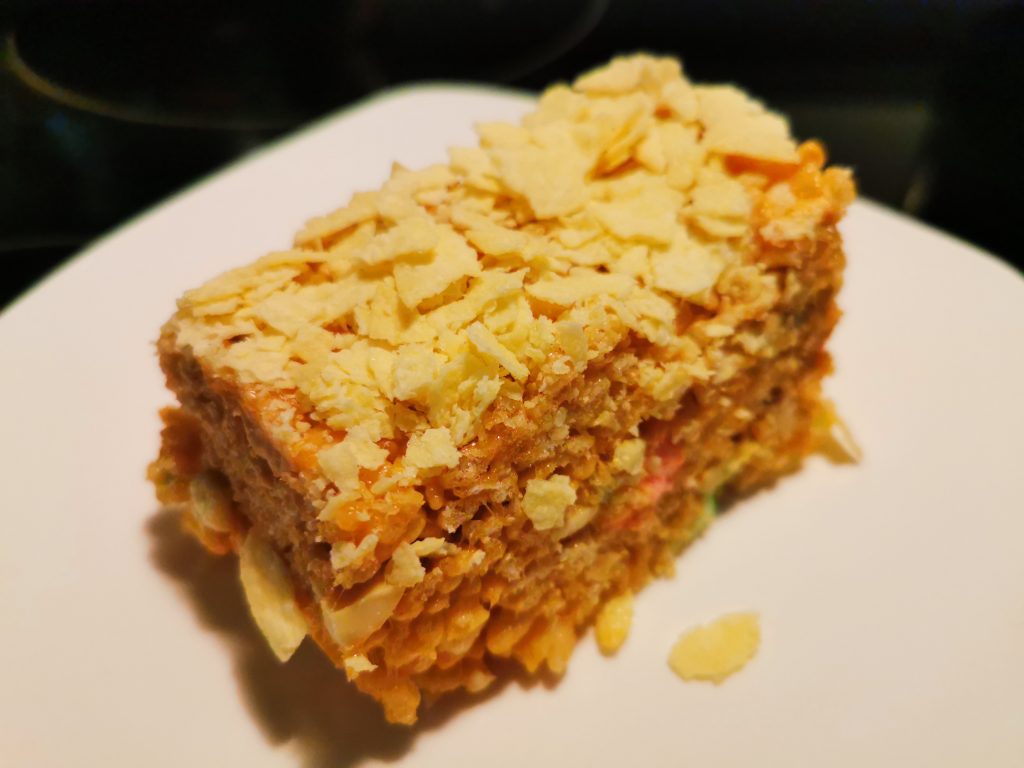
#COOKING: FUNFETTI CORNFLAKE CRUNCH COOKIES RECIPE

Funfetti Cornflake Crunch Cookies. Okay, full disclosure, these are very similar to those amazing cookies you find at Momofuku‘s Milk Bar, but we’ve added a Funfetti twist to it, because if you’re pulling out all the stops already and going over-the-top, you might as well go all the way! As usual, I reduce the sugar because the originals are way sweet and nobody has any business eating that much sugar.
Ingredients:
5 cups Corn Flakes
2 cups flour
1 1/4 cups unsalted butter at room temperature, cut into cubes
36 miniature marshmallows
3/4 cup miniature milk chocolate chips
1/3 cup organic raw sugar
1/3 cup brown sugar
3 tbsps sweetened condensed milk
2 tsps sea salt
1 tsp organic vanilla extract
1/2 tsp baking powder
1/4 tsp baking soda
1 egg
4 tbsps rainbow sprinkles
Instructions:
1. Place Corn Flakes, 3 tbsps sweetened condensed milk, 1/4 cup butter, 1/2 tsp salt and half of brown sugar on a baking tray. Bake at 300°F for 15 minutes. Set aside.
2. In large bowl, use handmixer to cream 1 cup butter and half of brown sugar and all of raw sugar. Mix till creamy for 2 minutes.
3. Add egg and vanilla, cream with handmixer for another 5 minutes.
4. In another bowl, mix flour, 1 1/2 tsps salt, baking powder and baking soda.
5. Slowly add-in flour mixture to butter mixture using handmixer. Mix for 1 minute.
6. Using spatula, fold-in chocolate chips, corn flake mixture and sprinkles. Mix gently till combined evenly.
7. Using hands, form dough into 12 large balls. Stuff each dough ball with 3 marshmallows. Place on parchment paper-lined tray and refrigerate for one hour.
8. Set oven at 370°F. Arrange dough balls about 3-4″ apart from one another on baking sheet. Bake 13-15 minutes till golden. Transfer to cooling rack and store in air-tight container. Makes 1 dozen.
Gallery:
(Photo credit: Mr. Will Wong)
#COOKING: FRESH MOZZARELLA, RICOTTA & KIMCHI-STUFFED ZUCCHINI BLOSSOMS RECIPE

Mozzarella, Ricotta & Kimchi-Stuffed Zucchini Blossoms. These are all the rage right now with Zucchini Blossoms being available right now, through end of August. We made the best of our trip downtown with a visit to our fave Eataly, where we found everything we needed to make these. We love the combination of cheese and Kimchi (Korean Pickled Cabbage) as these flavours blend beautifully. You can do this without Kimchi, just add a bit of sea salt to the filling to taste to account for it.
Ingredients:
Package of Zucchini Blossoms (usually contains about 20)
1/2 cup Ricotta
1/4 cup Fresh Soft Mozzarella (Mozzarella Classica), minced
1/4 cup Kimchi, minced
1/4 cup whole milk
1/4 cup flour
1/4 cup Parmesan Cheese, grated
3 eggs
1 tsp Truffle Oil
1 tsp parsley
Sea salt and pepper to taste
Canola Oil
Instructions:
1. Heat canola oil in large skilled on medium heat, till oil is hot. Oil should be about 2″ high.
2. In shallow platter, mix flour, milk, 2 eggs, 3 tbsps Parmesan, parsley, salt and pepper until it becomes a smooth batter.
3. In bowl, mix minced Fresh Mozzarella, Ricotta, 1 egg, Truffle Oil, 3 tbsps Parmesan and a bit of pepper till combined. Do not over-mix.
4. Take Zucchini Blossoms, opening gently till you can see the base. Gently scoop in a bit of the cheese mixture, careful not to over-stuff. Take a smidge of Kimchi and press it into the cheese gently. Pinch tip of Blossom to seal. Refrigerate a few minutes in refrigerator.
5. Dip stuffed Blossoms into batter, coating lightly. Place into oil and repeat, frying Blossoms in batches, careful not to overcrowd skillet.
6. Fry till golden brown, about 2 minutes each side. Place on paper towel-lined tray to absorb oil. Serve.
Gallery:
(Photo credit: Mr. Will Wong)
#COOKING: FEAST FOR A KING | BLUEBERRY TIRAMISU RECIPE

Feast for a King. We’ve been on our best behaviour and it’s time for a feast! This combines all our favourites, Rib Steak, Sushi, Jumbo U.S. Spot Prawns and of course Uni (Sea Urchin), which is only available at points in the year at your local seafood market. We were so lucky to come across some so we thought we’d splurge a little! Incredibly creamy and umami, Uni might be an acquired taste for some, but it is the most amazing thing we’ve ever tasted. This feast is simple, sophisticated and elegant. And we’ve earned it!
Finish this off with a dead-simple Blueberry Tiramisu which you prepare the day before. No baking – just simple easy-to-find ingredients.
Ingredients:
1 lb Jumbo U.S. Spot Prawns
10 oz Rib Steak
10 pieces fresh Uni/Sea Urchin
1 cup Botan Calrose Rice
3 tbps Seasoned Rice Vinegar
1 tsp organic raw sugar
1/4 tsp sea salt
5 sheets Nori, quartered and toasted
Ground Pink Himalayan Salt
Ground Peppercorns
Olive Oil
Soy Sauce
Wasabi
Instructions:
1. Season steak with Himalayan Salt and Peppercorns, refrigerate for about 3 hours and bring out about 45 minutes before cooking.
2. In rice cooker, prepare rice. Rinse once and add 1 1/2 cups water. Cook fully and unplug once finished. Open lid and season with rice vinegar, salt and sugar. Mix gently and leave lid open to breathe. Once slightly-cooled, scoop into a serving bowl.
3. Pre-heat oven at 200°F. Place Nori on baking sheet (ungreased) and bake for about a 1-2 minutes, careful not to burn. You are toasting til crisp. Remove tray from oven right away. Stack on plate for serving.
3. Clean shrimp. Bring pot of salt water to boil and add prawns. Cook medium-high heat for about 2-3 minutes till cooked. Remove from heat and rinse under cold water. Pat dry with paper towels and arrange on plate.
4. Rinse Uni in cold water gently. Pat gently with paper towels till try. Arrange on plate and keep chilled till ready to serve.
5. Pre-heat Air Fryer at 400°F for 3 minutes. Brush steak sparingly with olive oil and fry for about 8 minutes. Once cooked, remove from Fryer and slice into thin strips. Season once more with Himalayan Salt. Arrange on plate.
6. In shallow small dish, combine Wasabi and Soy Sauce to taste.
7. Serve by taking Nori sheet, with one spoon of rice scooped-on. Dip Uni, Steak and Prawns in Wasabi-Soy and wrap in Nori and rice. Eat with hands.
Blueberry Tiramisu
24 Nilla Wafers or about 16 Ladyfingers
473 ml carton of Whipping Cream
250g tub of Mascarpone/Cream Cheese/Smooth Ricotta (room temperature)
2 tbsps Coffee Liqueur
2 tbsps high-grade Instant Coffee (brand suggestion: Davidoff or Maxim)
1 cup fresh Blueberries
3 tbsps icing sugar
1 tsp Vanilla Extract
3 tbsps Cocoa Powder
Instructions:
1. In small bowl, mix equal parts hot water and instant coffee. Add coffee liqueur. Stir well and set aside.
2. In large bowl, use handmixer to mix whipping cream till stiff peaks form. Mix-in cheese, vanilla and icing sugar until smoooth and creamy. Do not over-mix.
3. Dip Nilla Wafers in coffee mixture quickly and layer along bottom of loaf pan/dish.
4. Spoon cream on-top. Stack with layer of blueberries and then coffee-dipped Nilla Wafers. Layer again with remaining cream.
5. Sift Cocoa Powder on-top. Cover with wrap tightly and refrigerate overnight.
6. When ready to serve, scoop onto dish and top with more blueberries.
Gallery:
(Photo credit: Mr. Will Wong)
#COOKING: MAGNOLIA BAKERY-ESQUE BANANA PUDDING RECIPE
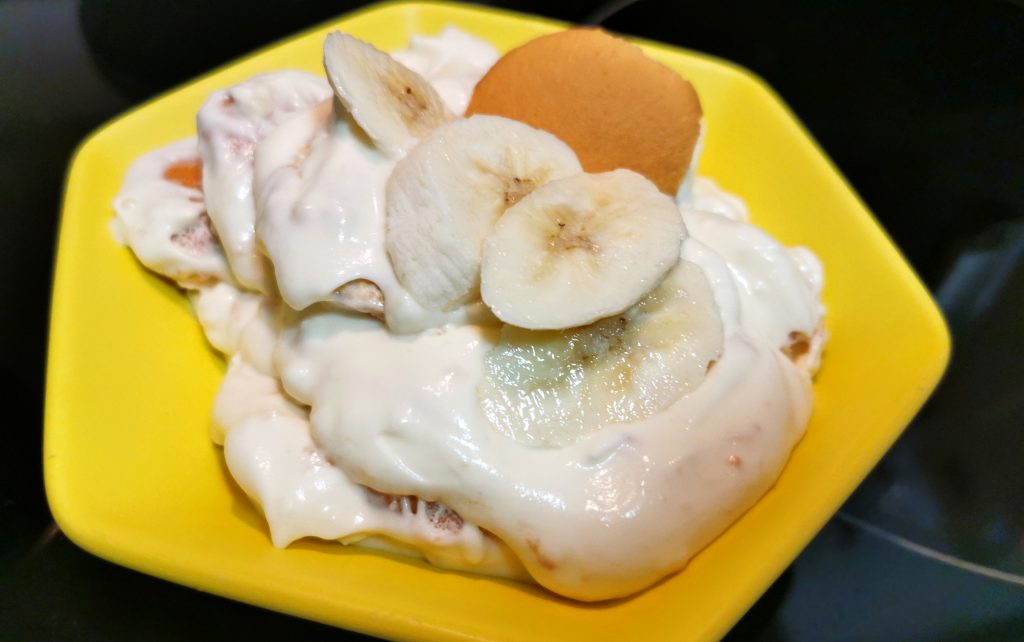
Magnolia Bakery-esque Banana Pudding Recipe. If you’ve ever been to New York City, surely you’ve made time to have a cupcake or a slice of cake at this famed bakery. But their Banana Pudding is revered and we love that THE GIRL WHO ATE EVERYTHING gave it a crack deciphering their recipe! We loved it but made some modifications to fit our palate. This is an awesome treat for a cool day. It’s like a Banana Pudding-meets-de-constructed Banana Cream Pie. Hope you enjoy our take with even more banana flavour and less sweet. This is super-easy to make. If you really can’t find Nilla Wafers, use Ladyfingers.
Ingredients:
150g of Mr. Christie‘s Nilla Wafers
3 cups whole milk
473 ml whipping cream
1 package of Jell-o Banana Cream Pudding
5 tbsps sweetened condensed milk
4 bananas, sliced thin
Instructions:
1. In saucepan on medium heat, warm-up milk. Do not let it boil.2. Stir-in pudding mix. Stir often to avoid it from going lumpy.
3. Stir-in condensed milk. Remove from heat. Allow to cool at room temperature before refrigerating for 2-3 hours.
4. Using handmixer, whip whipping cream until stiff peaks form.
5. Fold cream into chilled pudding till fully blended. Do not overmix.
6. In large transparent bowl, layer Nilla Wafers and then a layer of sliced banana. Top with pudding cream. Repeat. Chill 4 hours.
7. When ready to serve, spoon mixture into dish and top with Nilla Wafers and more banana slices.
Gallery:
(Photo credit: Mr. Will Wong)
For advertising opportunites please contact mrwill@mrwillwong.com